Microsoft Space Simulator Pt 1
Running on real hardware for fun
Introduction
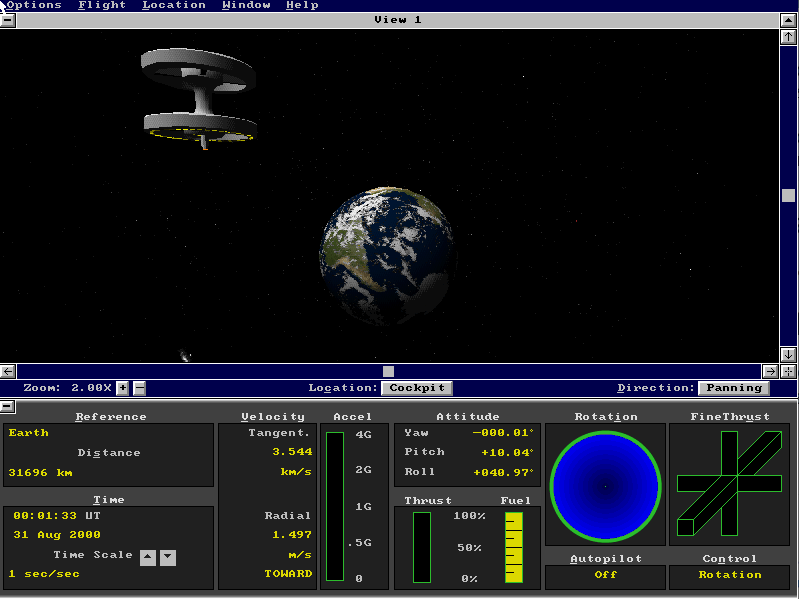
Microsoft Space Simulator is an artifact from a different era of computing, videogaming, and astronomy. It was published in 1994, and allowed the user to explore the unverse from their home PC, flying several different spacecraft in realistic as well as fanciful modes.
Space Simulator was a particular staple of my childhood computing experience. It was a brilliant sandbox for a child with a serious interest in spaceflight and astronomy, enabling a range of experiences from the realistic to sci-fi fantasy. You could launch the shuttle to dock at the ISS, Fly to mars and land on our base there, or take a relativistic jaunt to nearby galaxies.
It’s difficult to understate the scale of change that’s happened in astronomy, computing, and videogaming between the 90s and the 2020s:
- The entire history of consumer 3d acceleration hardware starts with 3dfx in 1994 and is now a $70 billion dollar industry powering LLMs.
- In 2024 a mid-level consumer GPU can compute dozens TeraFLOPs, a computational speed that would have taken dozens of room-sized supercomputers in the 90s.
- CPUs have gone from having millions of transistors in the 90s to 10s of billions of tranistors in the 2020s …A factor of 1 million…
- Astronomical survey data has grown from the 66 GB Digital Sky Survey to the 500 Petabyte Legacy Survey of Space and Time in progress at the Rubin Observatory …This is a factor of nearly 10 million…
In the spirit of appreciating this change and better understanding our past, I plant to reverse engineer parts of Space Simulator and see what modding opportunities are available. It would be interesting if there were ways to bring modern data into this old system.
This first entry focuses on running Space Simulator in the 2020s.
The Problem With Emulators
Like many DOS games, Space Simulator relies on the constancy of the processor’s cycles with respect to wall-clock time. DOS emulators have settings set a constant number of processor cycles per wall-clock second. These settings only work when run on modern variable-clock-speed hardware because there are almost always enough clock cycles available that the emulator can maintain the illusion of of constant steady execution to running programs.
Space simulator, unfortunately, is more sensitive than other DOS games to the small differences between the emulated and real versions of a constant cycle rate. Space Simulator owes this sensitivity to the gravity calculation it performs to update the location of your spacecraft. The gravity calculation is extremely sensitive to numerical error.
Space simulator avoids numerical error by predicting time-step paramters which will right-size the calculation to your computer’s processing speed. When Space Simulator gets this balance wrong, it does a catch-up calculation with more aggressive parameters in order to maintain the game’s synchronization to wall-clock time.
The catch up calculation is inherently more error prone, and is triggered more often in emulation even when the emulator is configured to use a constant cycle rate. Unfortunately this is game-breaking: Your spacecraft, which you have spent some hours cajoling onto a carefully chosen trajectory, suddenly veers off into the great void with no hope of return.
While an emulator can run Space Simulator, and will prove useful for reverse engineering,…Real hardware is necessary for any non-trivial play session
Real Hardware
The pesky processor clock changes were introduced to PC’s with the advent of ACPI, which provides a standard for the operating system to directly communicate clock changes to the processor. Windows 98 was the first Microsoft operating system1 to implement ACPI, and ACPI cannot be disabled. Space Simulator therefore needs to run on Windows 95 or earlier.
Windows 95 was also the last operating system where DOS device driver compatibility still existed, with the paradigm for device drivers shifting significantly in Windows 98. The ideal machine for running Space Simulator must have Windows 95 and DOS drivers available for the graphics card and sound card.
Around the time of Windows 95, it also became common to do real-time signal processing in device drivers to save cost and space when developing sound cards. These soft-audio cards cause the same issue as emulation in Space Simulator, but only if Space Simulator is configured to play sounds. We also need to avoid these soft audio cards when picking hardware.
Joysticks on Windows 95 must be through the gameport. Because I did this project with laptops, I know less about the compatibility of Space Simulator with models of gameport joysticks. The two alternate ways to plug in a joystick are USB and PCMCIA. Windows 95 USB HID drivers only support mouse and keybord, and do not support the USB joysticks of the time. PCMCIA cards that add a gameport are in short supply, and have questionable driver compatibility with Windows 95. If you are able to get either USB or PCMCIA gameport working on Windows 95, please contact me and tell me how you did it.
Putting all these requirements together, and no space to put a tower computer, I chose a Dell Latitude CPx H laptop for this project. The Windows 95 device drivers for the Latitude CPx are all available on dell’s website (in 2025). The H model includes a real sound card that has DOS SoundBlaster compatibility in the original driver. I also replaced the original hard drive with a modern 32GB SSD (Solid State DIsk) to arrive at the following system specs:
- 500 Mhz Pentium III processor
- 128 MB RAM
- ATI Mobility M1, 2x AGP
- ESS Maestro 2E Sound Card
- 32 GB PATA IDE SSD
Unfortunately this machine lacks gameport or ethernet connectivity. To compensate for the latter I bought a USB PATA enclosure for the SSD, so it can be removed from the machine and plugged into a modern machine to download files.
If you are buying one of these machines, I highly recommend Ebay or your local computer recycling center. If you are buying a machine of this age, it is important to look at its insides to see if components like the CMOS battery or Power Supply are degrading. Most can be replaced, but leaking fluids from these components can damage the system. Modern replacements are generaly available, and can be installed with some soldering expertise to prolong the life of the system.
It is also a good idea to check the Heatsink and Fan, and potentially install new thermal compound between the processor and the cooling equipment. Not only do these physical compnents degrade over time, but in the next step we will be entirely removing the processor’s ability to clock down when it overheats. We must ensure that the physical heat dissipation is operating as well as it possibly can.
Operating System Setup
I have an old copy of Windows 95 OSR2, a product key, and a boot floppy disk from the 90s; however, there are many places on the internet where one can find the requisite data and detailed instructions. Below I will cover an outline of the Operating system configuration process with links to resources.
BIOS Settings
The Dell BIOS needed to have all power management settings turned off. Even though this system pre-dates ACPI, the bios can still clock down the processor for thermal or power-saving reasons. Usually the relevant BIOS setting will clock the processor to some minimum value for thermal safety. On the 5000Mhz hardware selected, this is not a problem for Space Simulator, which is playable on a 2-300 Mhz machine.
Partitioning:
I used fdisk on the Windows 95 boot floppy to make a primary partition of 2GB (C:) and an extended partition (also 2GB) with a single logical dos drive inside (D:). The D partition was for data and device driver downloads from the main machine, so that it would not be wiped if I needed to install Windows 95 more than once.
Windows 95:
Because I have a laptop, the CDROM and the floppy disk cannot be connected at the same time. The Windows 95 OSR2 install CDROM is not bootable, so I cannot do the standard procedure of booting from the floppy disk and then continuing setup using the CDROM after a reboot. I therefore had to use the boot floppy to format C: as a bootable dos drive > FORMAT C: /S, copy over a popular DOS CD driver (OAKCDROM.SYS) and place short CONFIG.SYS and AUTOEXEC.BAT files to load the CDROM driver. This allowed me to boot off the C: drive and invoke the installer from the CDROM.
The rough order of operations in windows, modulo required reboots went as follows:
- Install Windows 95 OSR2 allowing it to take over the primary partition (C:)
XUSBSUPP.EXEmegapackage- Unofficial Windows 95 Service Pack
- Intel Chipet Driver Megadriver
- Dell Audio drivers
- DirectX 8.0a
- Dell Video drivers
DOS Mode
Space Simulator needs to use DOS Extended Memory in order to run at all. This conflicts with Windows 95, which uses the same technique to allocate its own memory for the shell and device drivers. Thus we will need to run space simulator before we load windows, and we will need to run the EMM386.exe memory manager.
The CONFIG.SYS and AUTOEXEC.BAT lines necessary for this setup are in the listings below. Note the DOS Mouse driver, CTMOUSE.EXE, which will be needed for Space Simulator mouse support. Note also the boot menu setup which allows a pass-through to windows.
CONFIG.SYS
[MENU]
MENUITEM=WIN,Windows
MENUITEM=DOS,DOS Expanded Memory
MENUDEFAULT=WIN,10

[WIN]
rem WINDOWS CONFIG.SYS lines go here

[DOS]
rem DOS CONFIG.SYS lines go here
DEVICE=C:\WINDOWS\HIMEM.SYS /TESTMEM:OFF
DEVICE=C:\WINDOWS\EMM386.EXE RAM
rem Prefer DEVICEHIGH over DEVICE for additional drivers
rem to preserve lower memory for Space Simulator.
AUTOEXEC.BAT
rem Run in both WINDOWS and DOS
LH C:\CTMOUSE.EXE /R2
rem On My setup the sound card driver loads here

GOTO %config%
:DOS
rem Only run in DOS Mode
GOTO EOF

:WIN
rem Only run in Windows mode
win
:EOF
Space Simulator
After copying the Space Simulator Files over to C:\SPACESIM, you can start the setup program using SETUP from the C:\SPACESIM directory. After going through the menus, launch the program with SS1.EXE in that same directory.
You will hopefully be greeted by the Blue Danube waltz, and a rock solid 20-30 FPS.
This setup is quite a bit more solid than what can be achieved with emulation, and more faithful to the original experience of the game.
Resources
Emulation:
Microsoft Space Simulator
- Microsoft Space Simulator Wikipedia Page
- Digital Antiquarian’s Deep Dive on Space Simulator
- Space Simulator Star Pilot’s Guide (Game Manual)
- Space Simulator Official Strategy Guide
- Microsoft Space Simulator Wikipedia Talk Page with Biographical notes about the programmer
- Space Simulator File download
Windows 95/DOS setup
- Windows 95 OSR2 downloads
- Phil’s DOS mode on windows 95 tutorial
- Windows 95 in the 2020s tutorial
XUSBSUPP.EXEdownload- Unofficial Windows 95 Service Pack
- DirectX 8.0a download
OAKCDROM.SYSdownloadCTMOUSE.EXEdownload